Our Artificial Stone can be installed with a limited knowledge of masonry practices. Over brick, block, painted concrete, wooden exterior or new concrete, metal lath should be applied to ensure a good bond. Over exterior wall construction, a weather resistance barrier must be applied first under the metal lath. Note: WRB is not usually required over cement or masonry.
Estimate the amount of stone and mortar you will need using this formula: Wall area = length x height of the wall Window area = window length x window height Wall area covered by corners = linear feet of wall corner x .75 Square footage required = wall area – window area – wall area covered by corners
Our Artificial Stone products can be applied to any structurally sound surface. Due to its light weight, no special foundation or structural alterations are necessary. On masonry walls (block, poured concrete, full brick) install 2.5 galvanized mesh directly to surface using concrete fasteners with a minimum of 3/4″ length and a minimum 3/8″ diameter head. For all wood or steel stud construction, all exterior sheatings should be covered with weather resistant barriers. Felt Paper as well. Then 2.5 galvanized metal lath should be attached with galvanized nails or staples penetrating 1″ into stud, 16″ on center, with nails 6″ apart. Lath to metal studs should be done with non-corrosive self tapping screws having a minimum of 1″ in length and minimum of 3/8″ diameter head. Metal lath must overlap 4″ at horizontal and vertical joints. Vertical joints must overlap on a stud.
As a rule, lathed surface should be covered with a thin coat mortar and allowed to set prior to installing the Artificial Stone. Mortar can be mixed with
enough water to achieve a workable (not too wet or dry) consistency in a mortar tray or a wheelbarrow. The same can be used for scratch coating, for applying the Artificial Stone and for grouting the joints. The mortar must be firm and moist before it is ready for use.
Mortaring the Artificial Stone
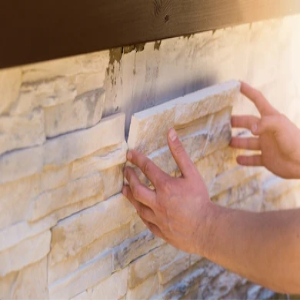
Lay out a good mixture of Artificial Stone–different sizes, shapes, textures and colors–around the work area to give you a better choice of stone. Select a stone and apply a 1″ thick, even layer of mortar to the back of the stone.
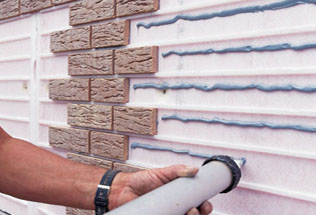
Use a mason’s trowel to spread mortar to the back of the Artificial Stone, 1/2-inch to 3/4- inch thick. Do not spread any more mortar than you can cover with stones before the mortar sets up and becomes unusable.
Applying the Artificial Stone
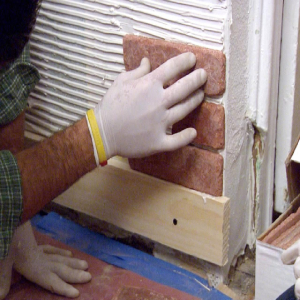
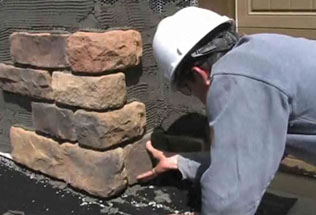
Install the stones so the joints are as narrow as possible–no larger than 1/2-inch-wide–to create a natural effect. Press the Artificial Stone firmly enough into place on the wall surface so that mortar behind the stone squeezes out around all sides. Using a gentle wiggling action while applying the stone would insure a good bond. In warm weather, masonry surfaces may need to be dampened prior to installing the stone so that the moisture will not be drawn from the mortar to rapidly. To keep the stone clean during construction, start installing Artificial Stone at the top of the wall surface and work down. Apply the corner pieces first for easiest fitting, alternating the long and short legs over the work area. Then apply flat pieces and work toward the center of the work area. Focus on keeping the joints consistent. When selecting stones, try to achieve a balanced pattern of shapes, sizes, colors, thickness and textures. Keep the mortar joints between the stones as tight and as uniform as possible.
Trimming the Artificial Stone
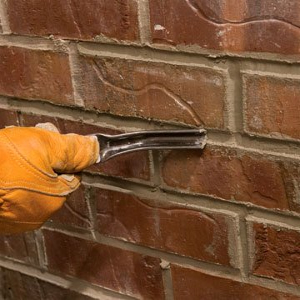
When necessary, cut, trim and shape stones with wide mouth nippers, a masonry hatchet, brick trowel or a wet tile saw to form special sizes and shapes for better fitting. Use small pieces to fill in gaps between larger ones. Use a dust mask and safety glasses when cutting cultured stones. Always try to position the trimmed stones on the wall surface so that the cut edges will not show.
Grouting the Joints
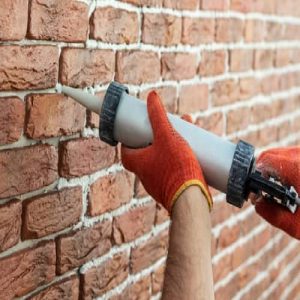
After all of the Artificial Stone has been applied to the wall surface, the mortar has become “thumb-print dry,” mix the grout so it is thin enough to be pushed through a grout bag but thick enough to stay in place in the joints. Partially fill the joints between the stones with mortar in the manner of decorating a cake. Be sure, while grouting, to cover any noticeable broken stone edges with mortar. Stir in a mortar colorant if desired to enhance the look of the Artificial Stone prior to grouting. All our Artificial Stone (Including Cultured Brick Veneer, Fieldstone Texture, Ledge Stone Texture, Rock Stone Texture, cultured stones) must have grout between each stone. We DO NOT WARRANTY a dry stacking installation.
Striking the Joints
When the mortar joints become firm, use a wooden or metal striking tool to rake out the excess mortar to the desired depth and at the same time to force the mortar into the joints to thoroughly seal the joint edges. Be careful not to work the joints too soon or the mortar will smear.
Brooming
Brush the mortar joints with a whisk broom or soft brush to smooth them and clean away the loose mortar. At the same time, broom off any mortar spots from the face of the stone. Loose mortar and mortar spots which have set for only a few hours clean up easily and should never be allowed to set overnight.
Completion
Artificial Stones do not require a sealer to warrant its guarantee. We do not cover damage to our Artificial Stone products from building settlement, excessive contact with salt or de-icing chemicals, paint or airborne contaminants. ACID should NOT be used for clean up.
Installation Team
Our mason are classically trained in all ancient masonry techniques, and have exclusive experience with all masonry materials. You can be assured that you are dealing with a professional brick cladding contractor.
We are premier contractors that can build a new cladding project, renovate or rebuild an existing structure, or design historical masonry restoration. Cladding work will give you a classic touch that will stand with heritage look; it has tremendous durability and will add value to your property too.
We offer a wide range of cladding materials to renovate, or restore your contemporary structure. We will use brick tile, cultured stone, and pavers and cement grouts to create your project, repair or renovate your old building, or refinish a historical building.

 Spirit level